Evercam Reports: user guide
Evercam Reports turns what your cameras record into reports you can read, share and act on. Ask about your site in your own words, shape the answer into a report, and have it run on a schedule you choose, with every result in your Inbox.
In this guide
Ask in Chat
Create a report
Customise your report
Save and schedule
Manage your saved reports
Read results in your Inbox
Ask about a result
Start from Explore
Good to know
Throughout this guide we follow one example: a monthly gate deliveries report for a project with a gate camera.
What you can do with Evercam Reports
Get answers straight from your site. Every answer is built from your cameras and site data, with key figures, tables and supporting photos.
Keep a report that runs on its own. Save the structure once, and each run follows it, so results arrive in the same format every time.
Keep everyone informed. Send each result by email to the people who need it, whether or not they use Evercam.
Dig deeper when something stands out. Ask a follow-up question about any result.
Before you start
Reports live inside a project. Open a project and select Chat. Each report covers one project.
You see what you already have access to. Answers and reports only use the cameras and data your account can see.
Richer data gives richer reports. Evercam Reports works from your camera images, and it can also use Gate Report, Smart Search and PPE detection where your project has them. For questions about vehicles and deliveries, Gate Report gives the most complete answers.
1. Ask in Chat
Every report starts with a question.
Open your project and select Chat.
In the box at the bottom, describe what you want to know, in your own words. You can be as specific as you need: a particular period, an area of the site, or what to count.
Send it. Evercam works out the answer from your site data and shows you key figures, tables and supporting photos.
If you need more detail or want to change something, ask a follow-up question.

Opening Chat on a project: Inbox, Saved reports and Explore sit under Reports
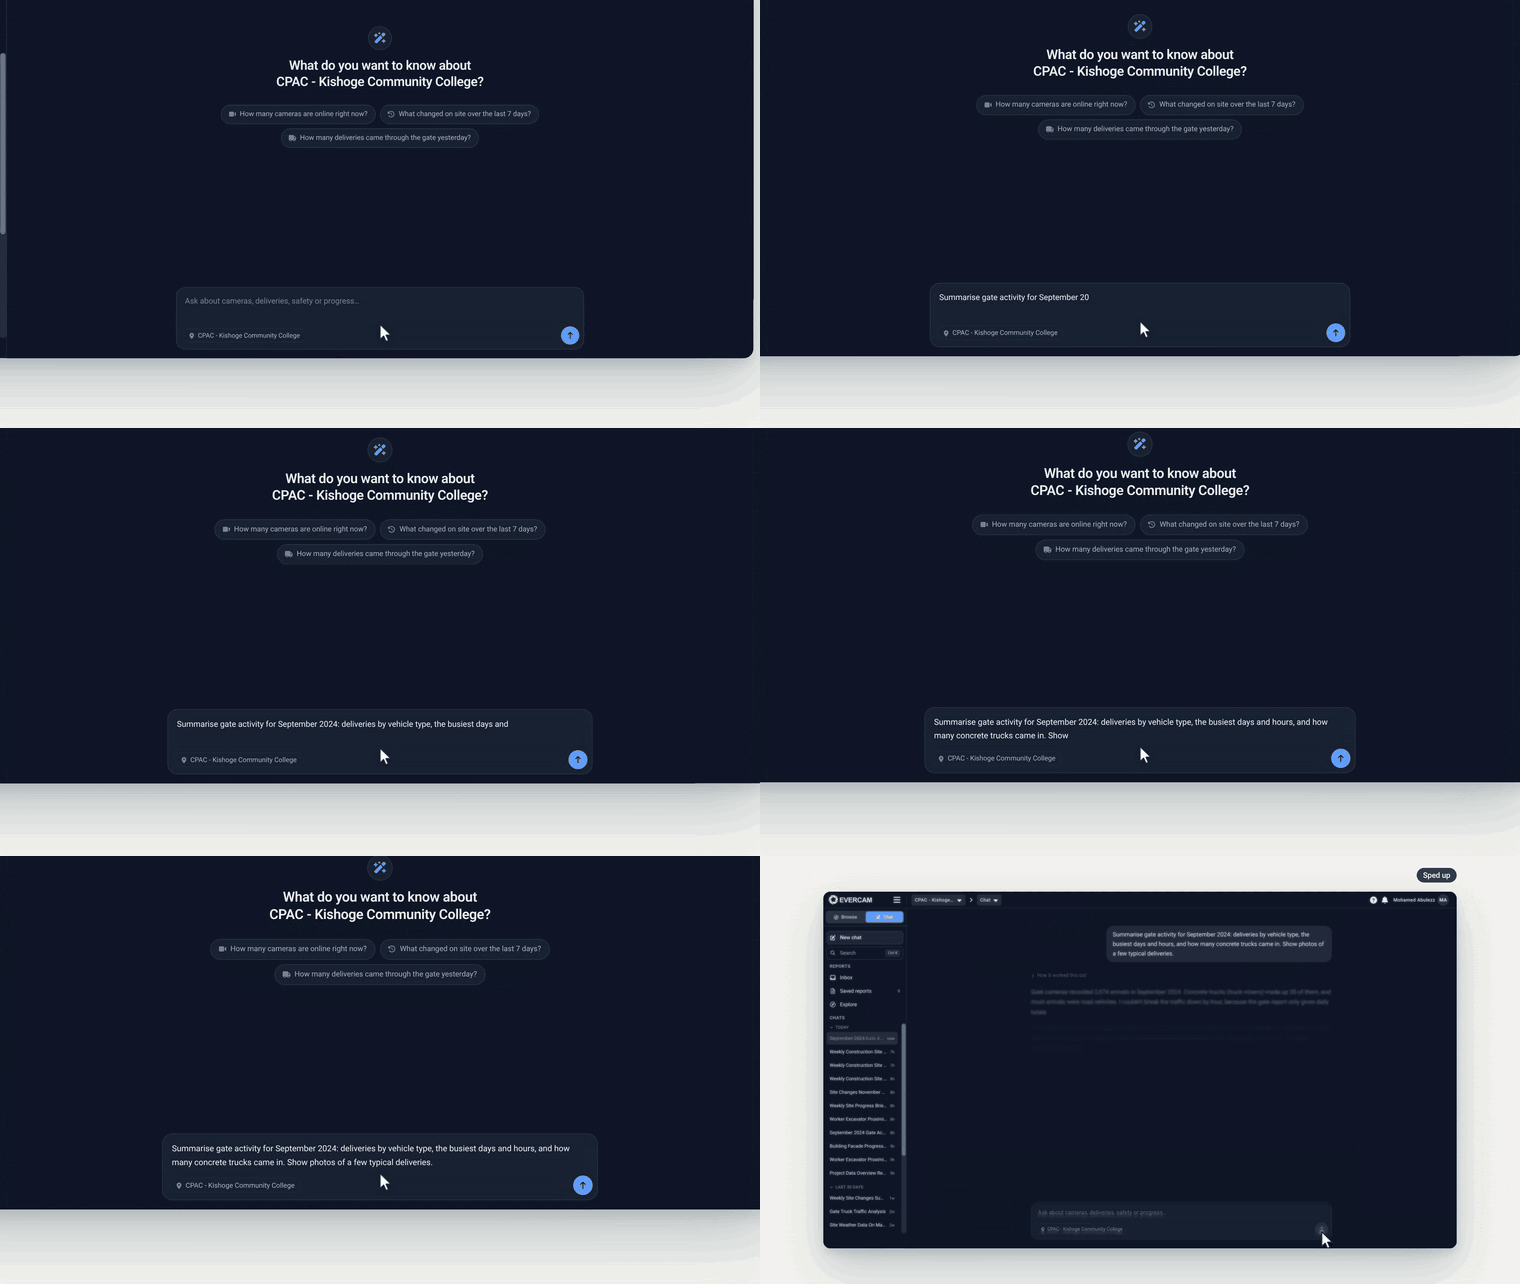
Asking for a month of gate activity in your own words
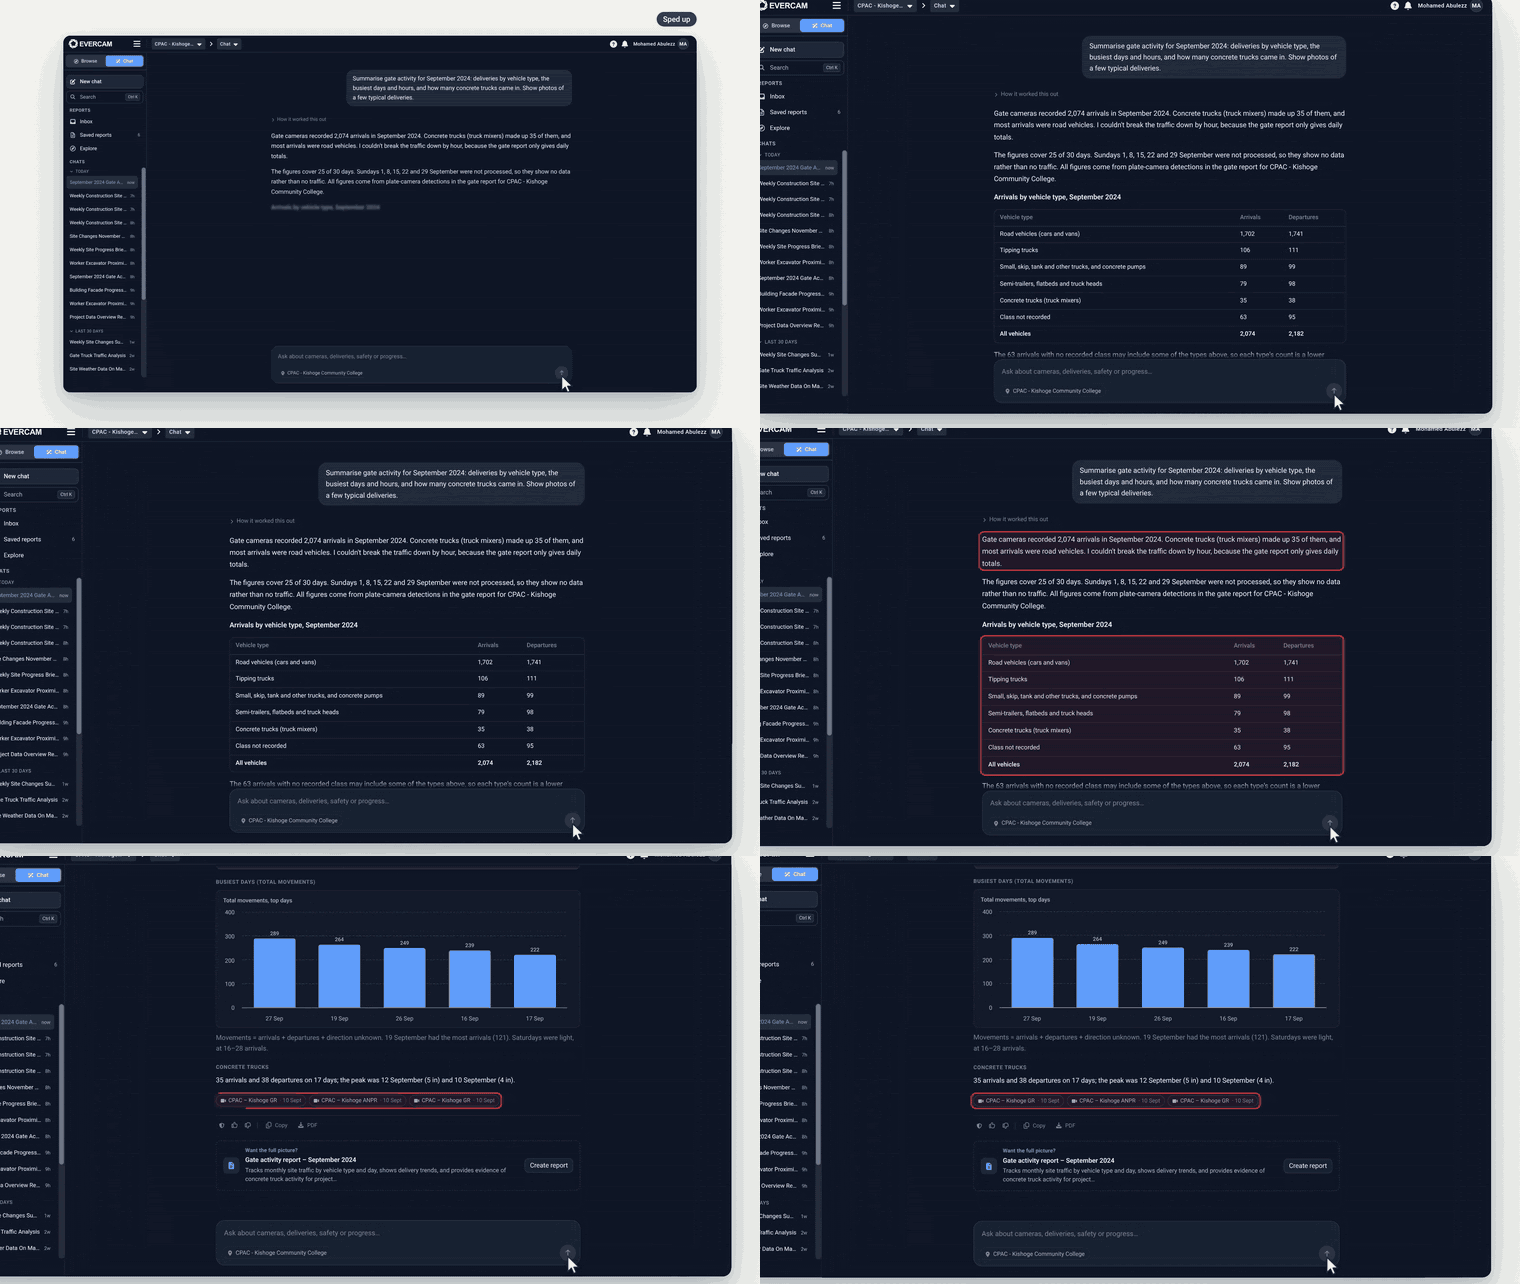
The answer: key figures, a breakdown by vehicle type and photos from the gate
Select How it worked this out under an answer to see where its figures came from.
2. Create a report
When a question deserves regular updates, turn the conversation into a report.
Under the answer, select Create report.
Evercam turns the conversation into a report structure: its purpose, the sections it covers and the rules it follows.
A preview opens beside the chat, so you can review the report as it will look.
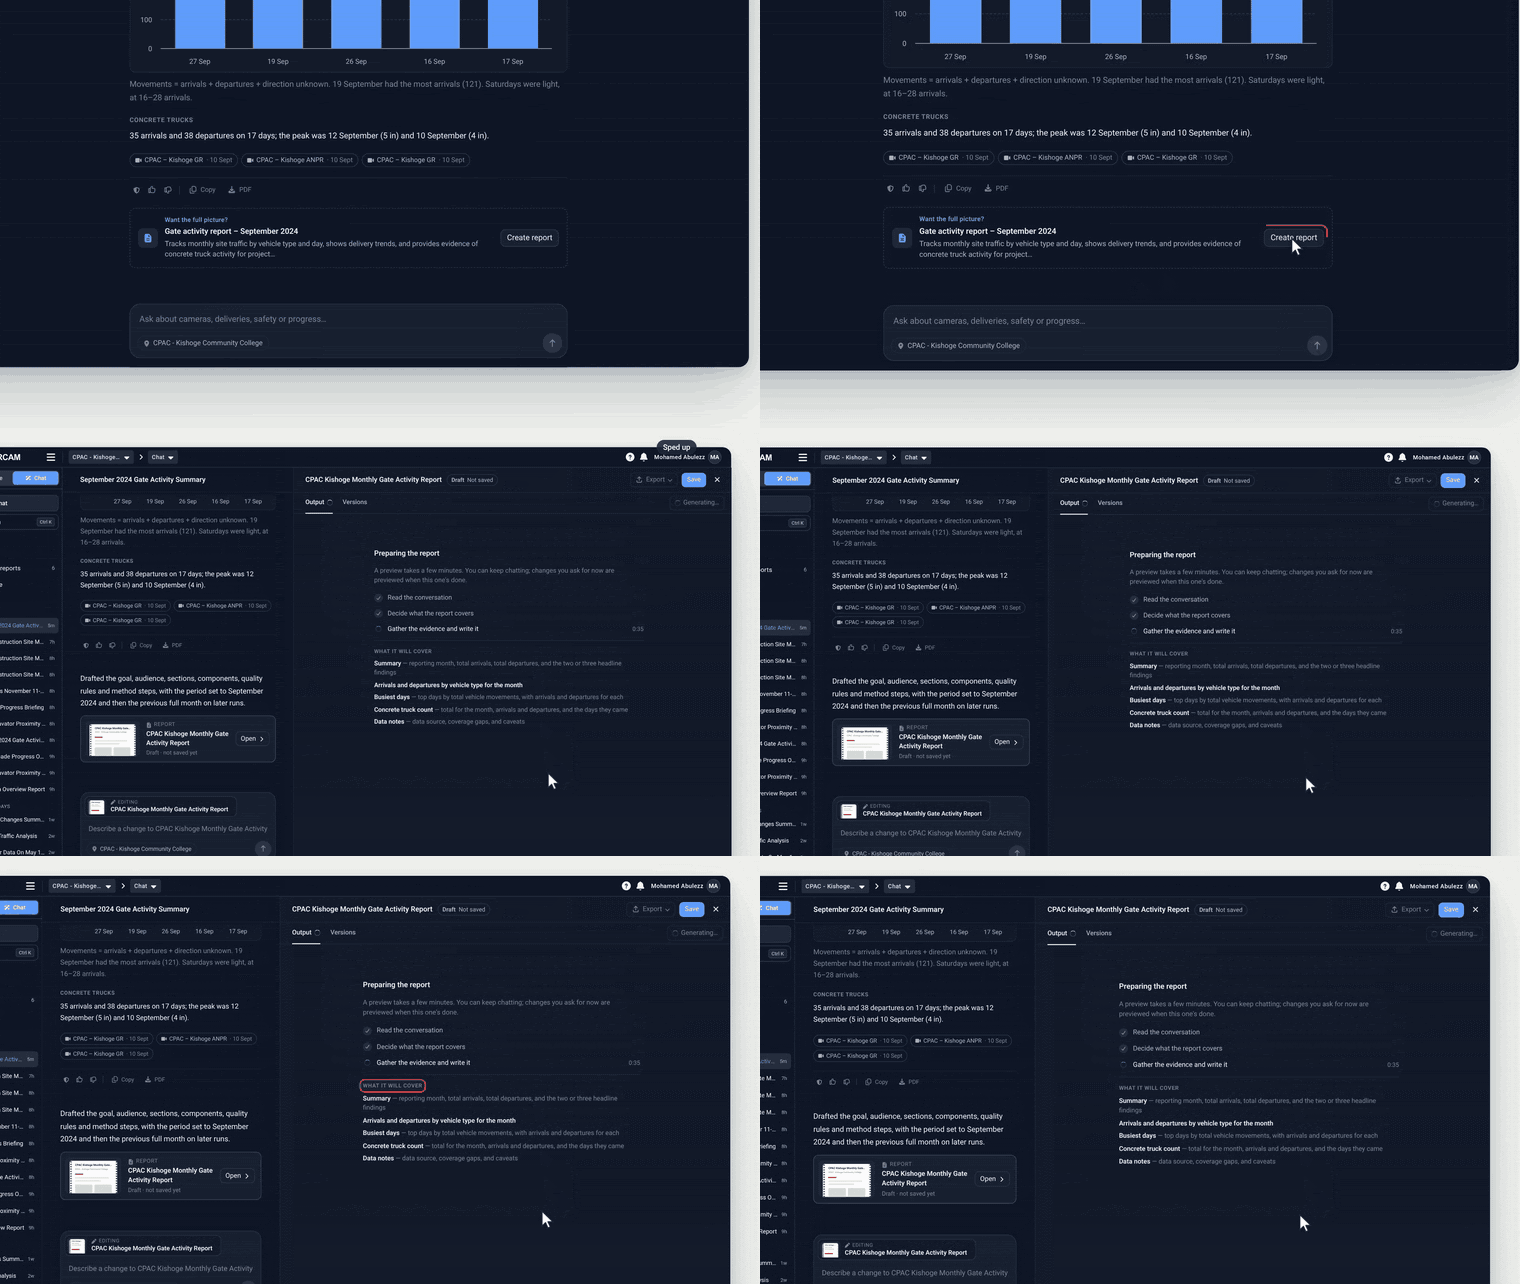
Selecting Create report turns the conversation into a report, with a preview beside the chat

The preview beside the chat, with sections Evercam suggests for this project
3. Customise your report
Shape the report by asking for changes in the chat.
Add a section. Select one of the sections Evercam suggests, or ask for your own.
Remove a section. For example: Remove the Data notes section.
Change a section. For example: In Busiest days, show only the top three days.
Every change is listed under the reply: additions in green, removals in red. The preview then updates so you can check the result. You can make one change at a time, or ask for several in the same message.
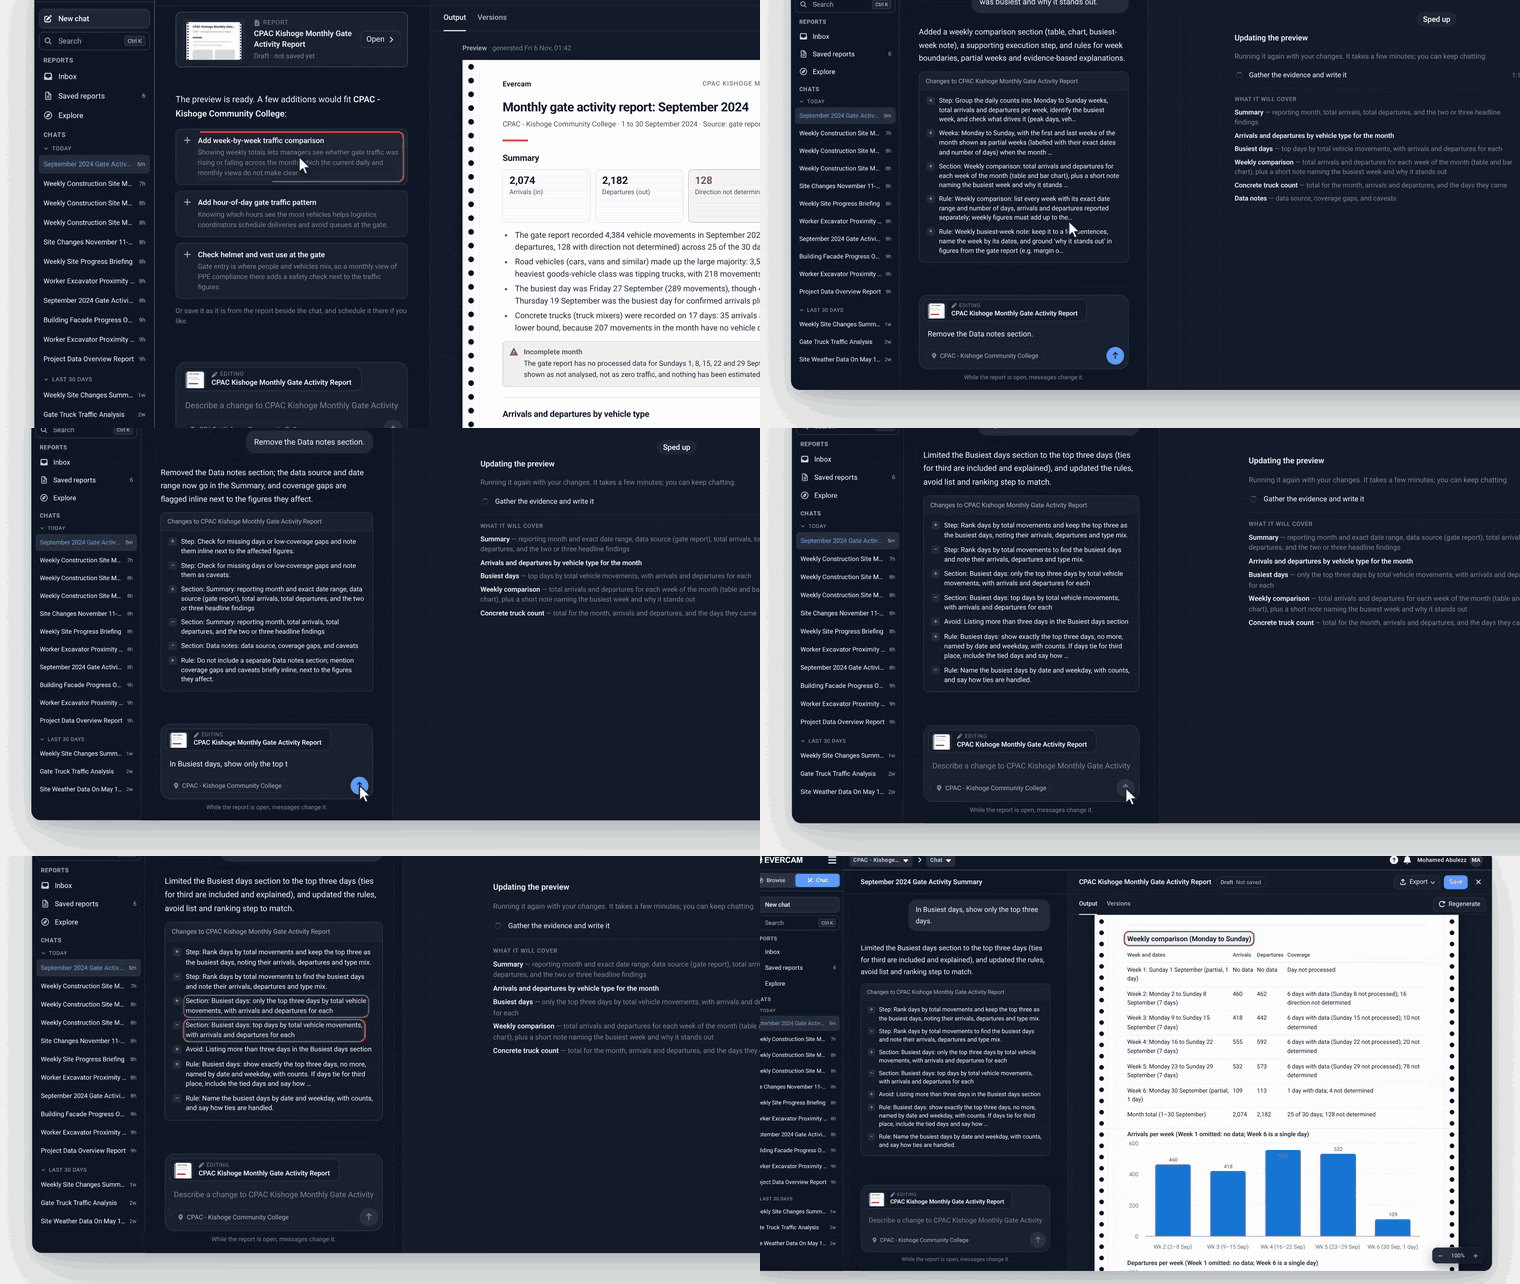
Asking for changes: each one is listed, and the preview updates

A change list: green lines were added, red lines were removed
While the report is open beside the chat, your messages change the report.
4. Save and schedule
Saving keeps the report's structure, so every run follows it.
Select Save.
Under Schedule, choose how it runs:
Manual: it runs only when someone runs it.
On a schedule: it runs on its own. Set the frequency, the day and the time, in site time.
Under Send each result to, enter an email address and select Add. Repeat for each person. Leave the list empty to keep results in Evercam only.
Select Save. To get a first result straight away, select Save and run now instead.
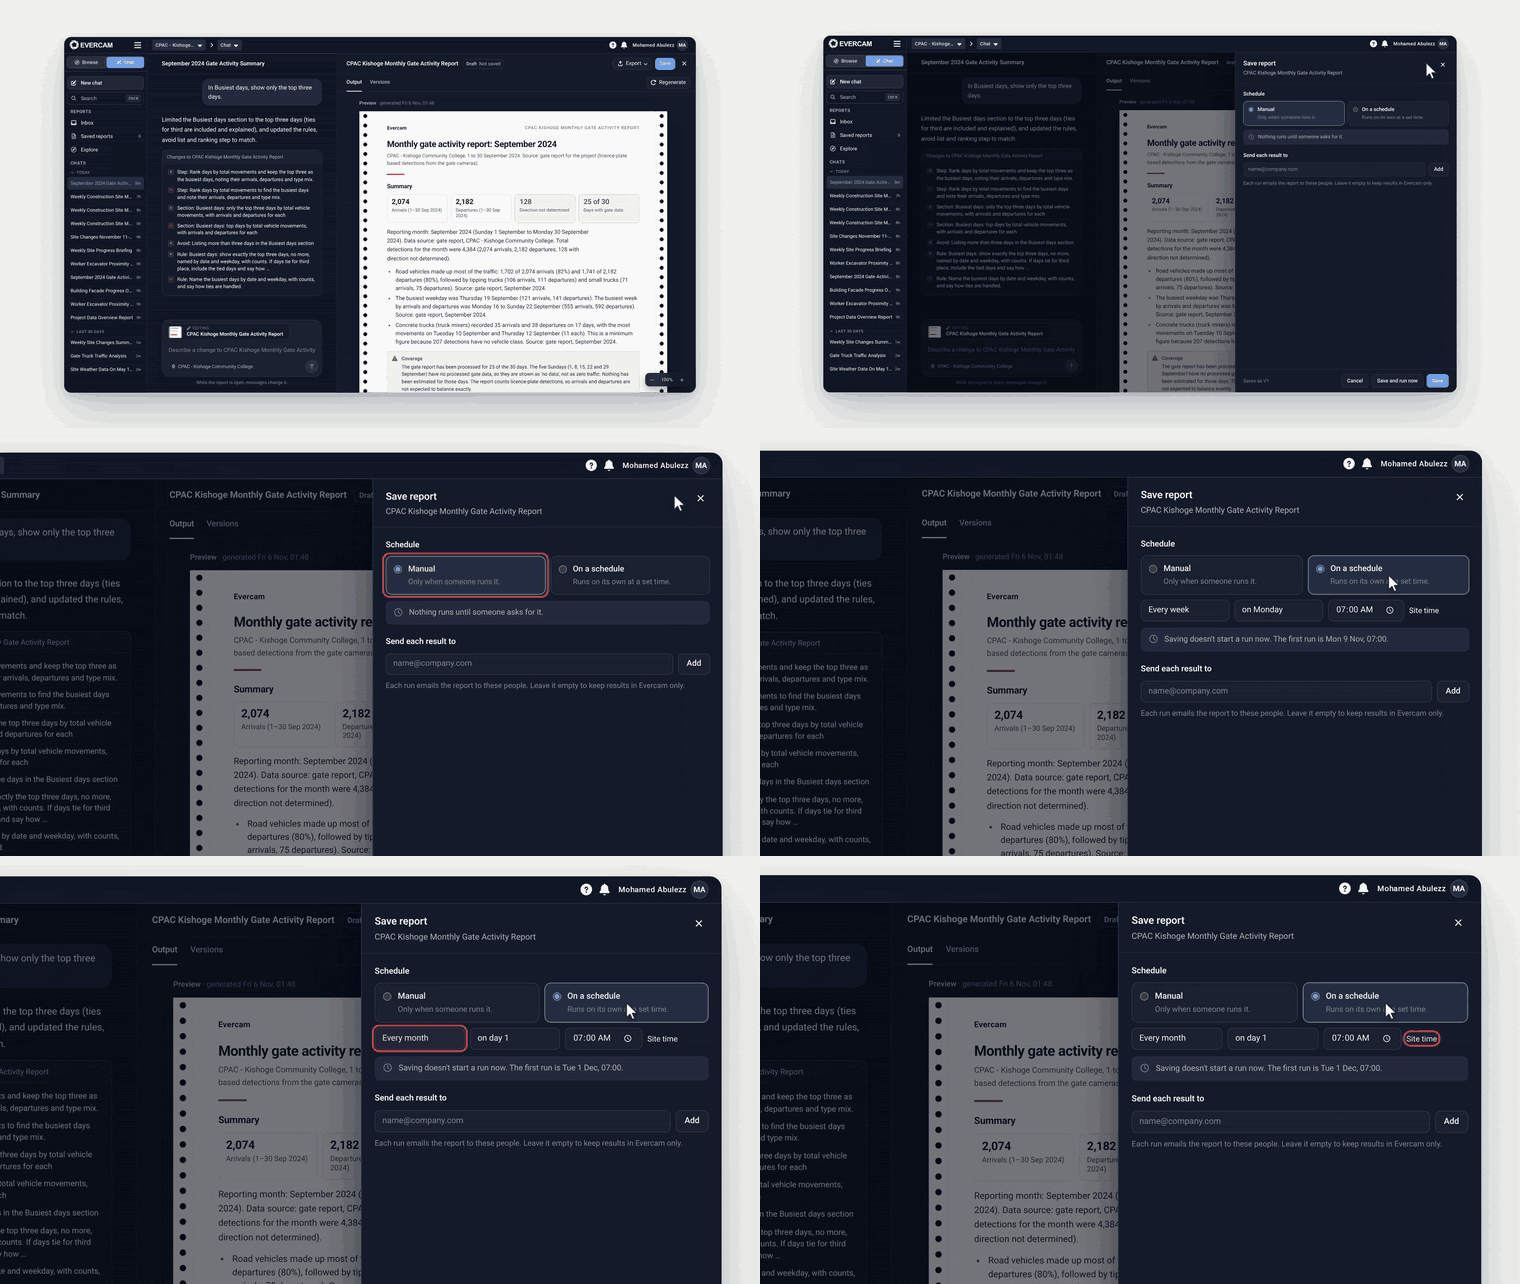
Choosing On a schedule and setting the frequency, day and time
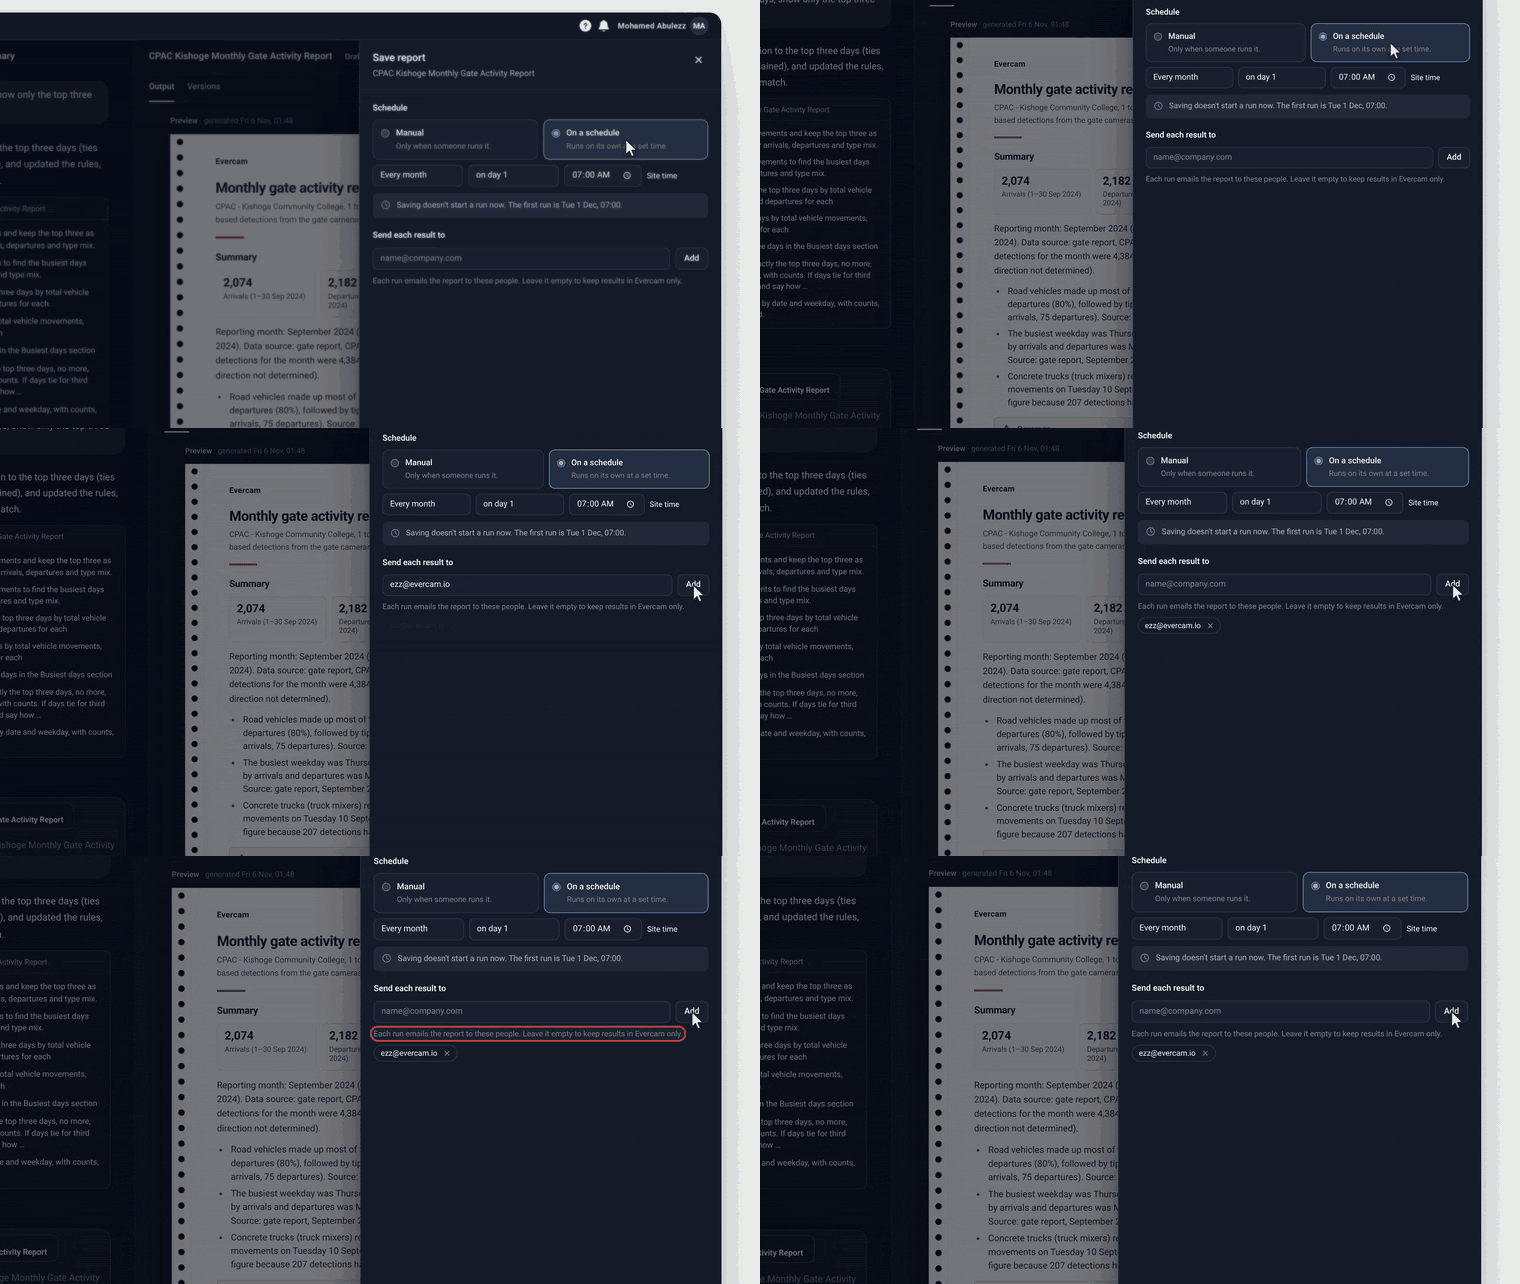
Adding a recipient
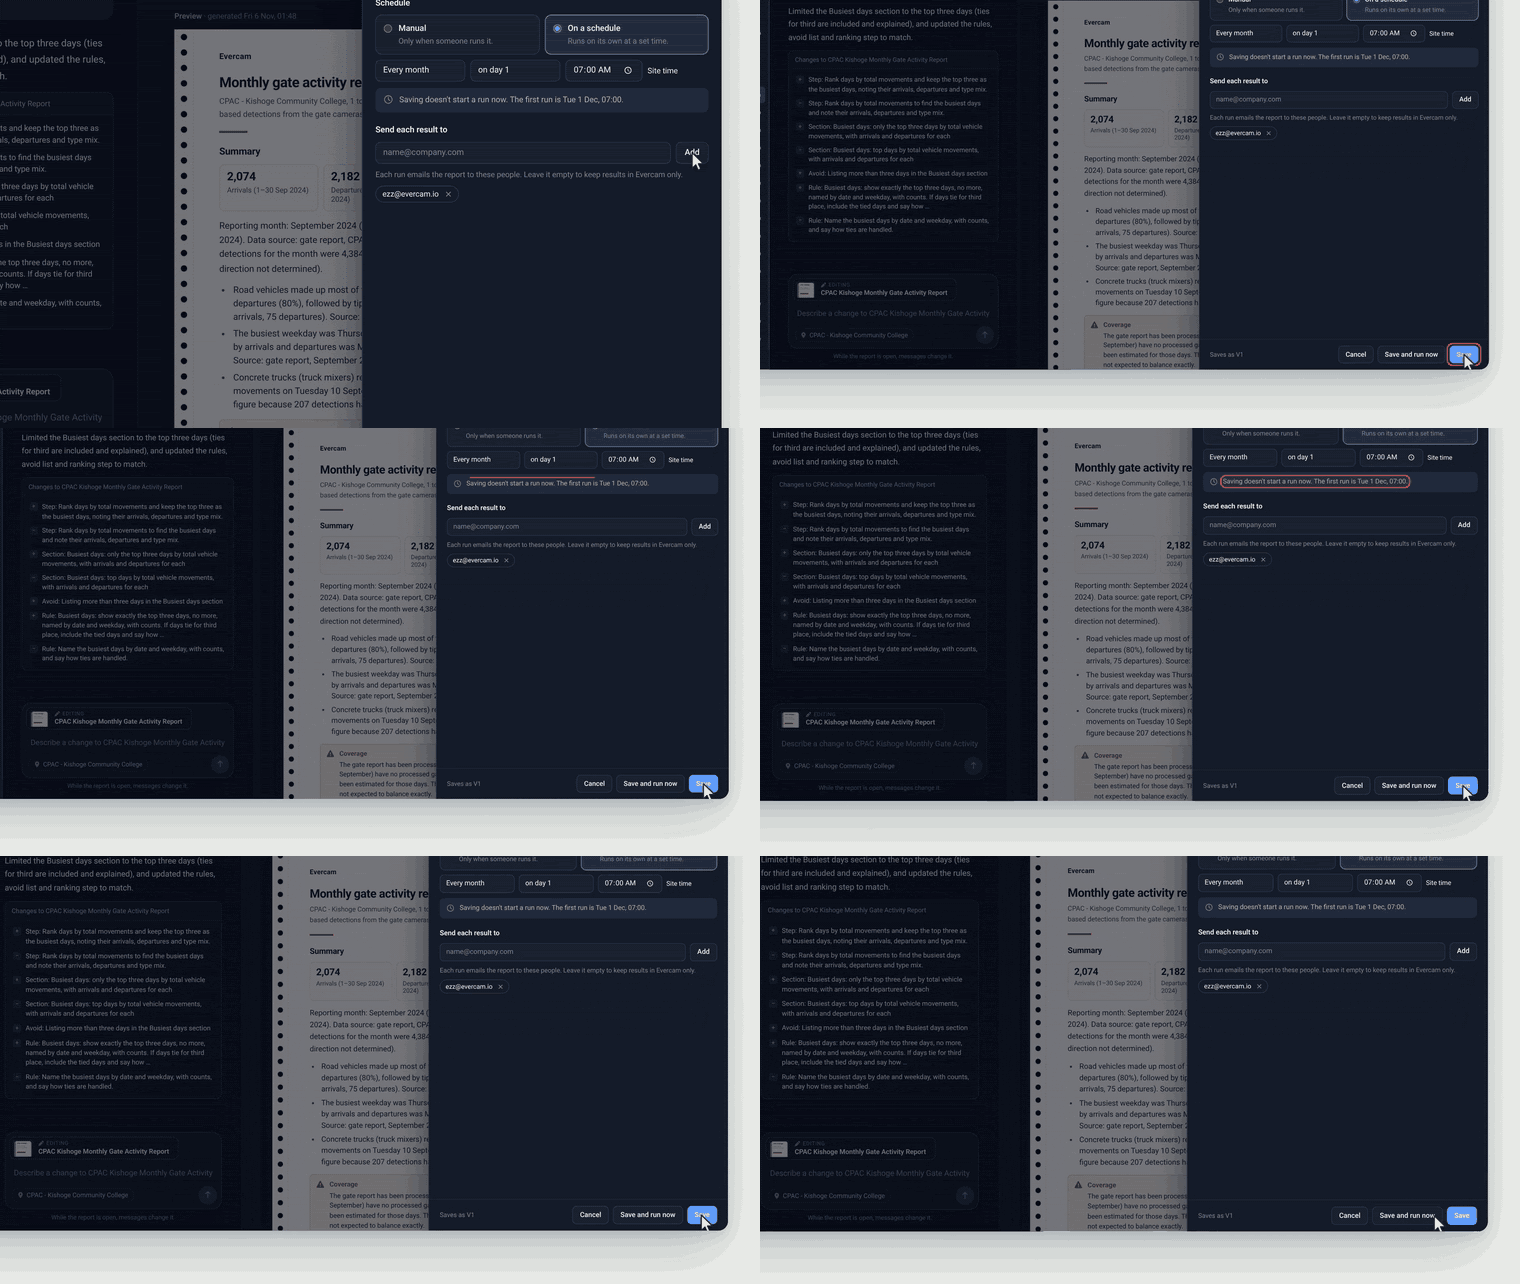
Saving the report and its schedule
Option | What it does |
|---|---|
Manual | Runs only when someone selects Run now |
On a schedule | Runs on its own at the frequency, day and time you set, in site time |
Send each result to | Emails each new result to these people |
Save | Saves the report and its schedule. The first result arrives at the next scheduled time |
Save and run now | Saves the report and starts a run straight away |
5. Manage your saved reports
Every report you save is listed under Saved reports.
Filter by All, Scheduled, Manual or Paused, or search by name.
Each row shows the report's schedule, its latest result and who receives it.
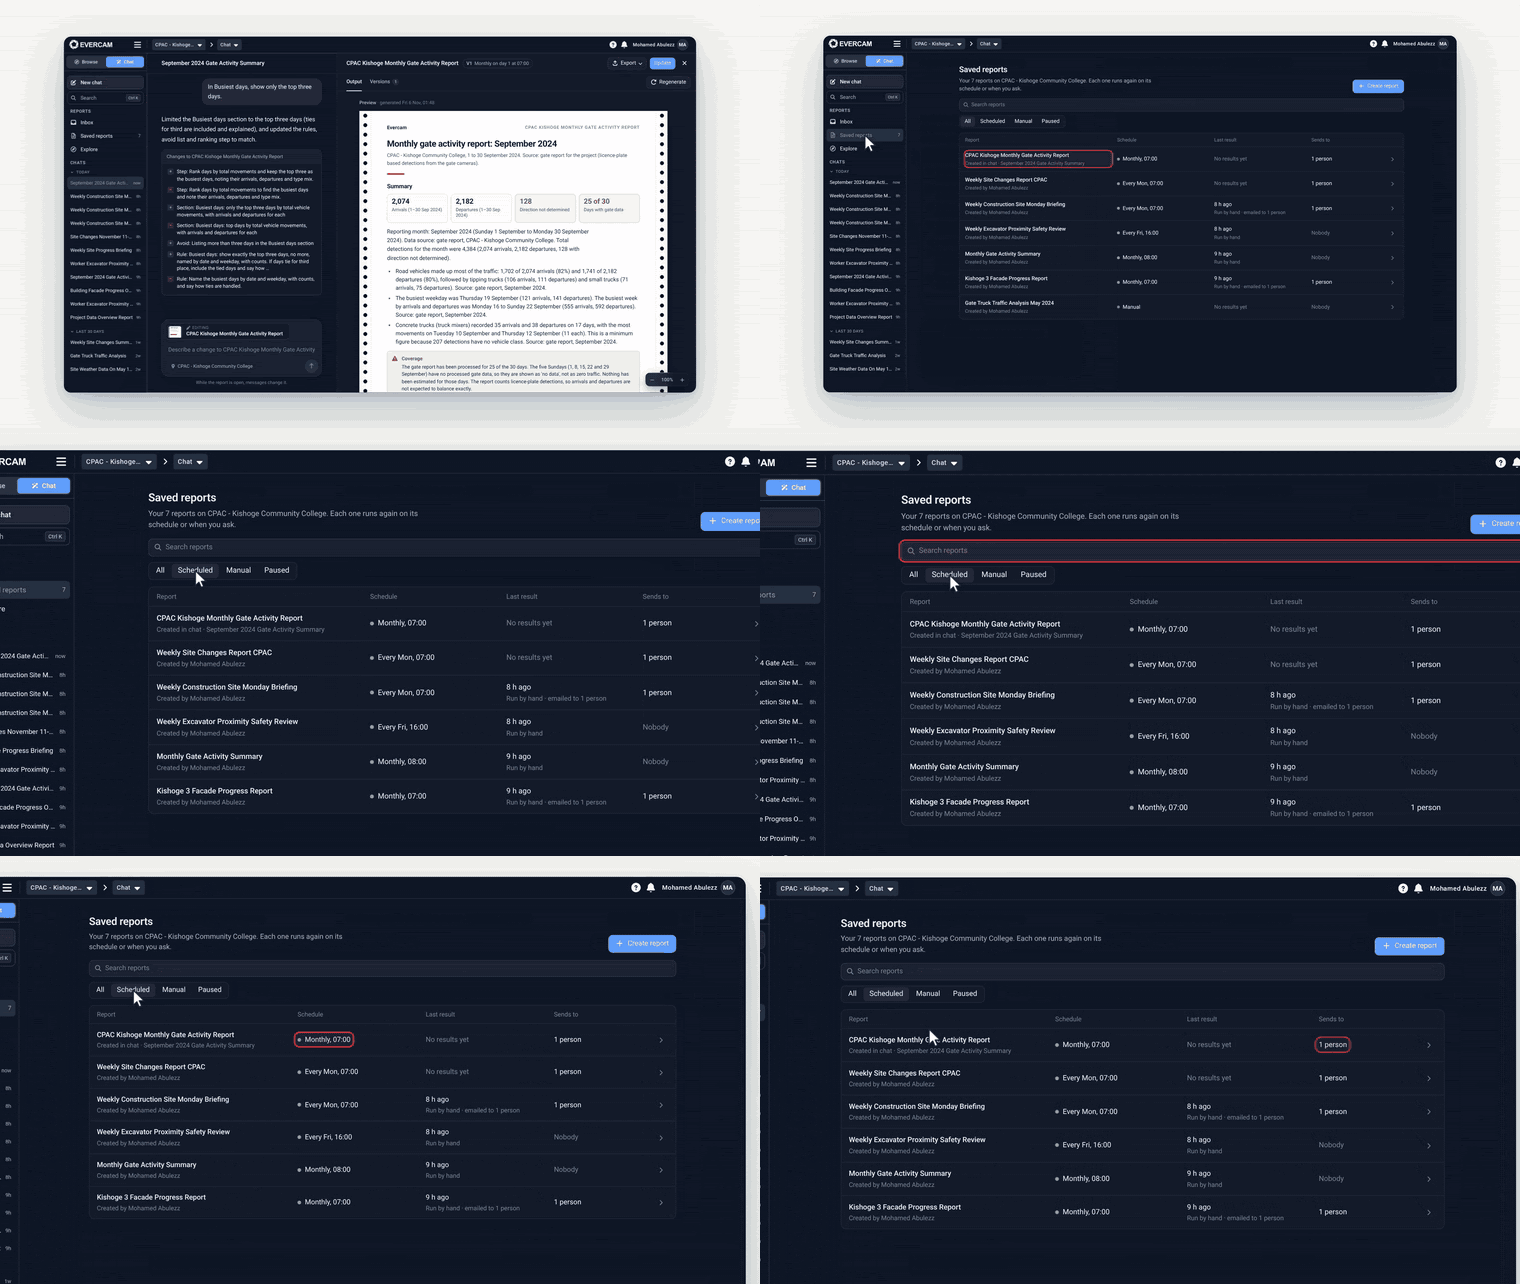
Saved reports: filter, search and see each report's schedule, latest result and recipients
Open a report to see everything about it in one place:
About and Covers: what the report is for and the sections it includes.
Schedule and Sends to: when it runs and who receives it.
Results: every result so far, newest first.

A saved report: what it covers, its schedule, recipients and results
From the report page you can:
Run it now. Select Run now for a fresh result.
Change its schedule or recipients. Select Edit next to Schedule or Sends to.
Pause it. Select Pause schedule. The report and its results stay, and no new runs start until you select Resume schedule.
Change the report itself. Select Edit in chat, ask for your changes, then select Update. This saves a new version, which applies to all future runs.
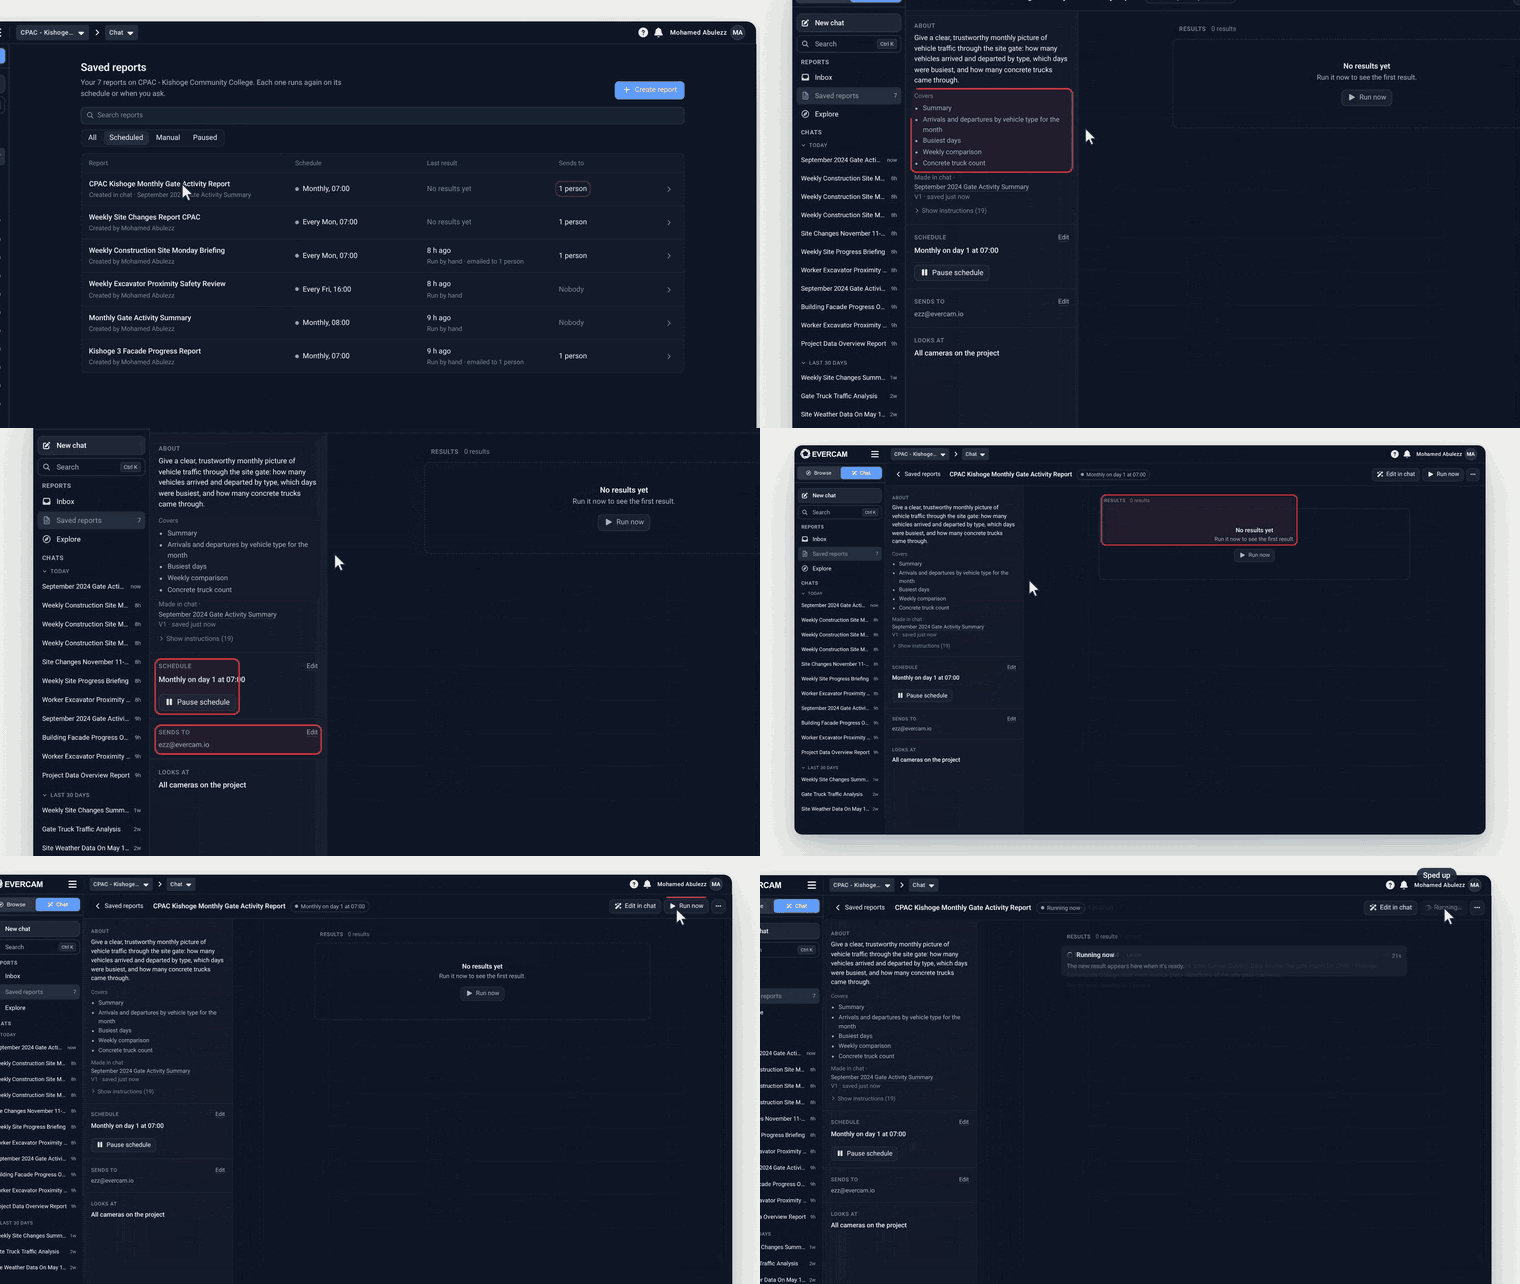
Opening a report and selecting Run now
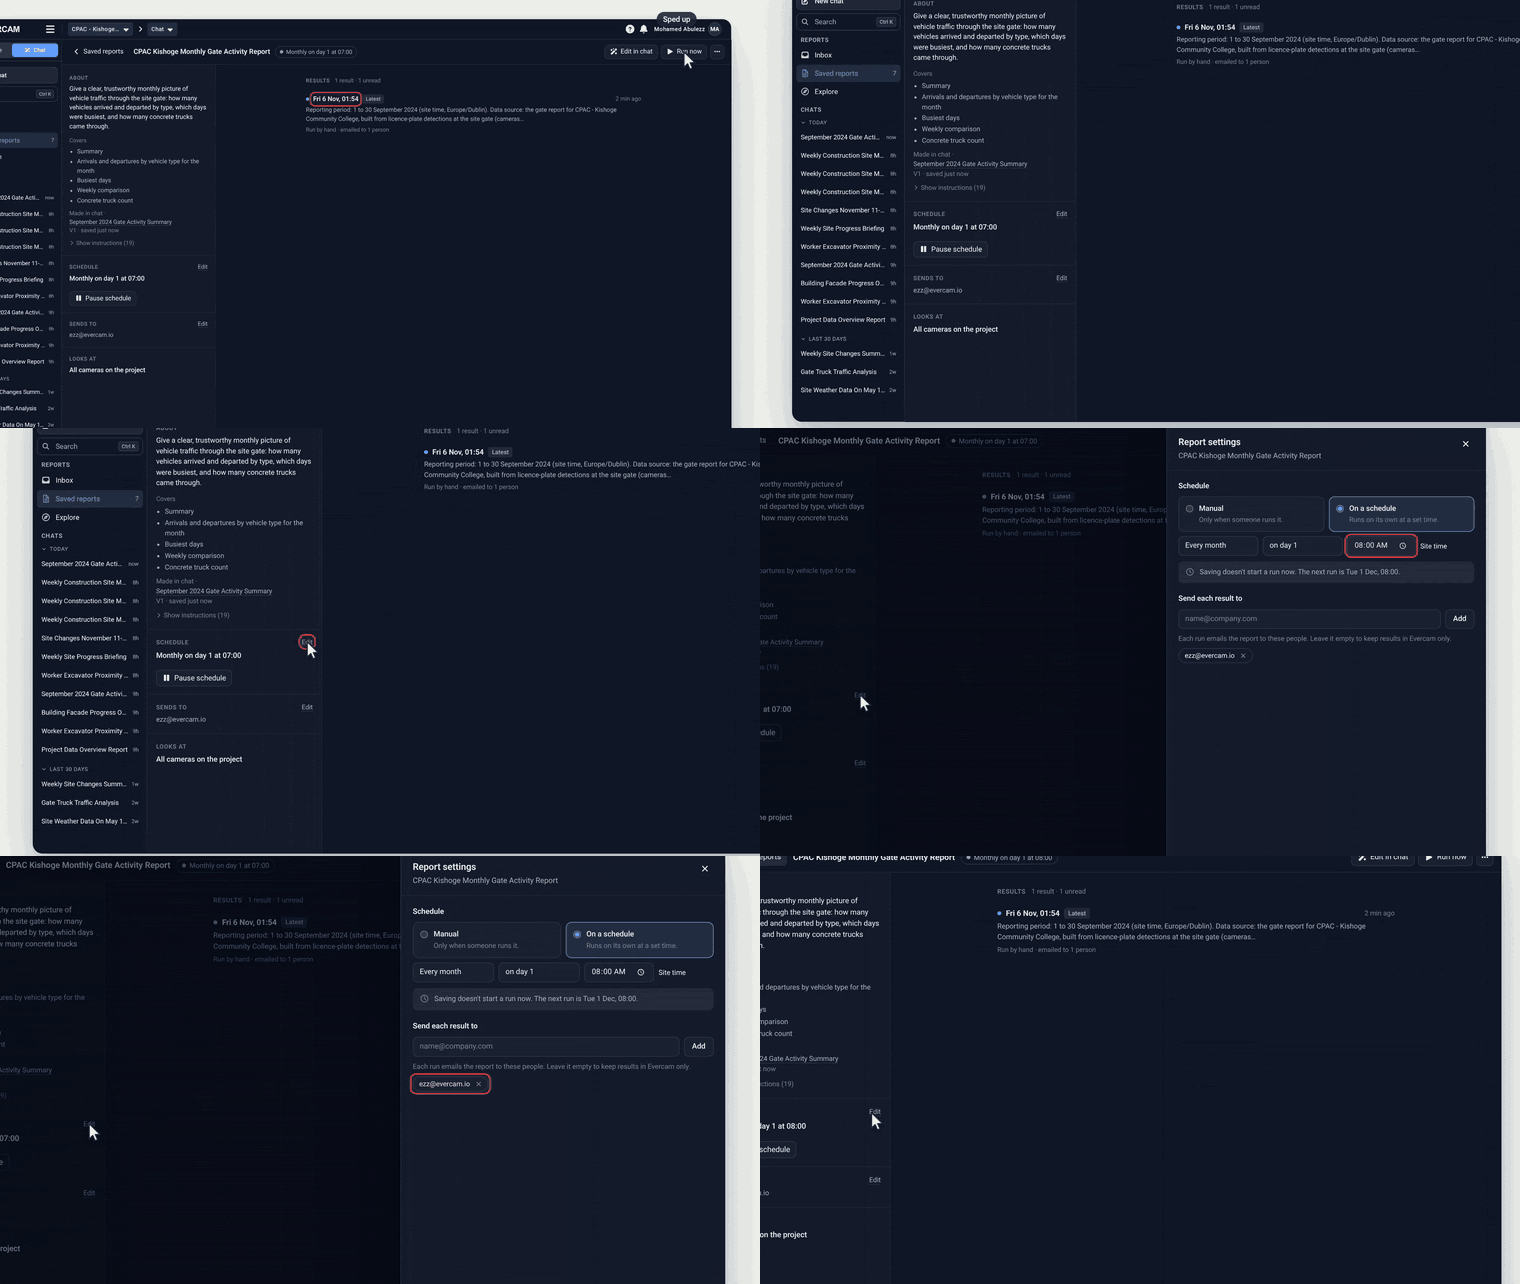
Changing the schedule
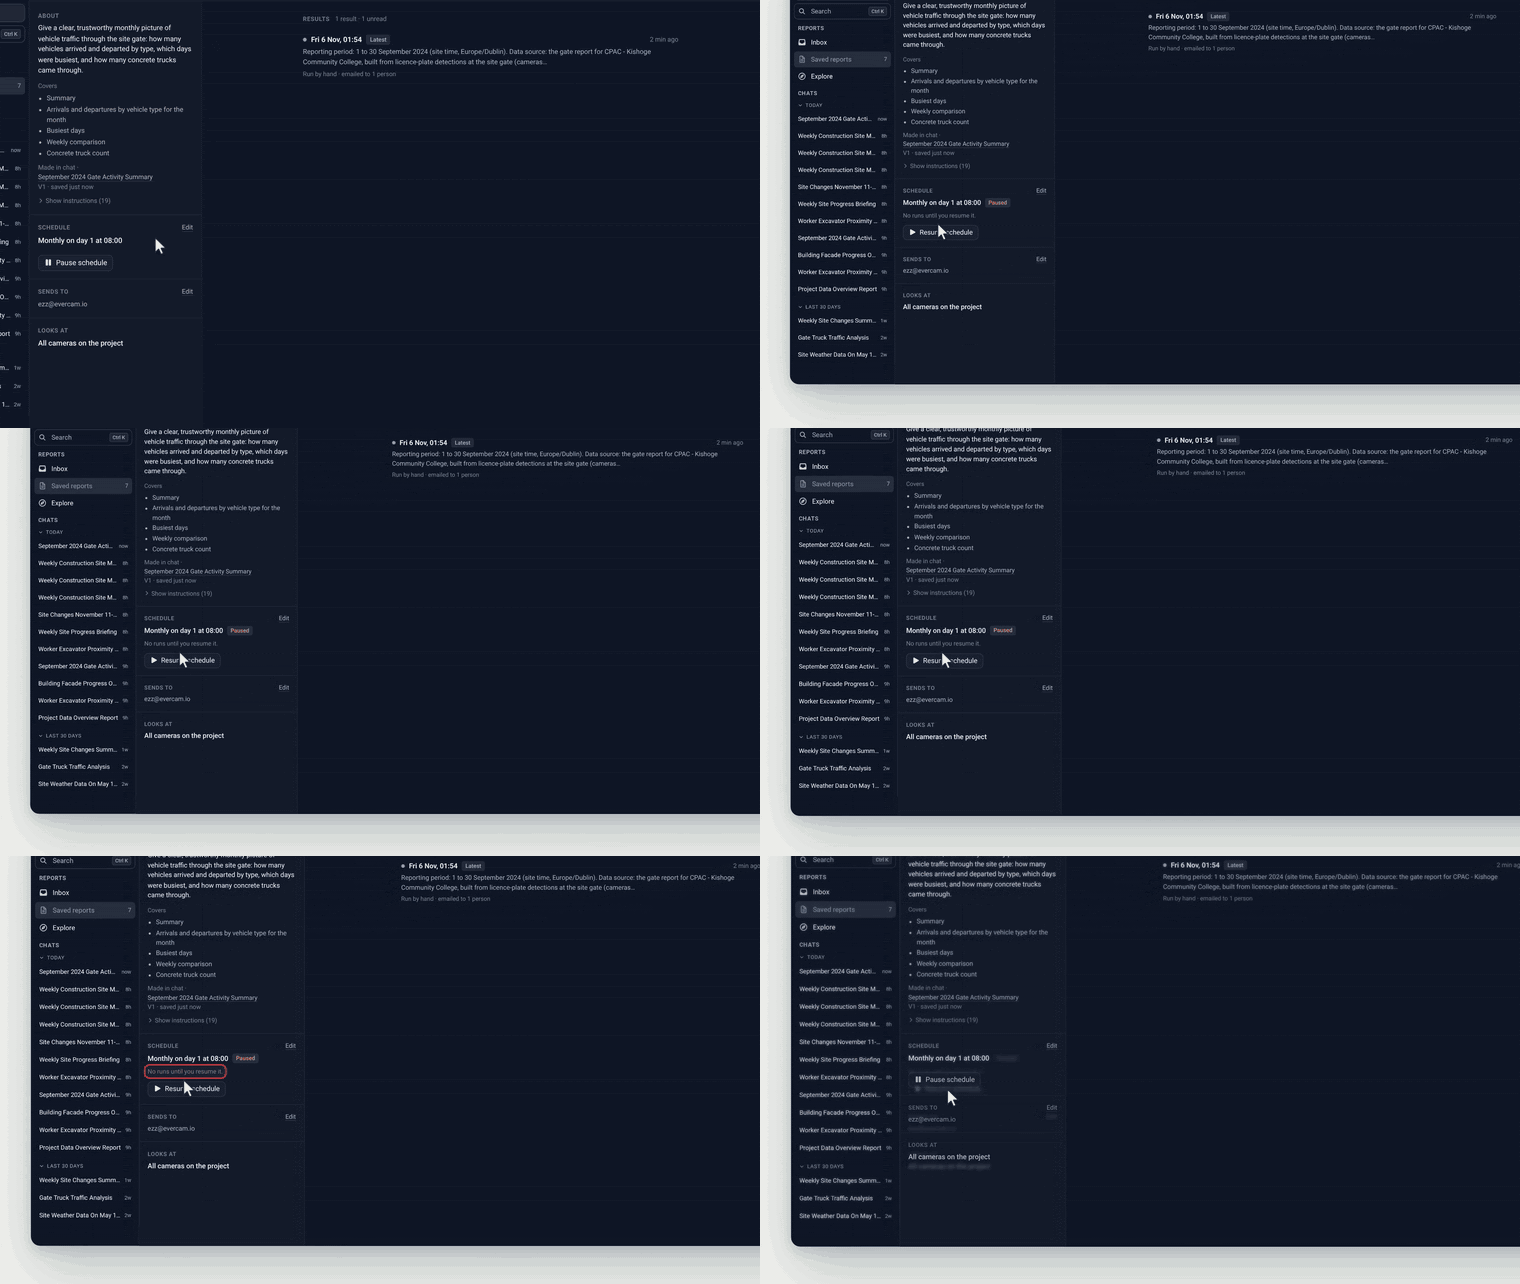
Pausing and resuming a schedule

Editing the report in chat
6. Read results in your Inbox
Each time a report runs, its result lands in your Inbox, newest first. Unread results are marked with a dot.
Search for a result, or select Filter to narrow by report and date.
Open a result to read it.
Select Open report to see the report itself and its full history.
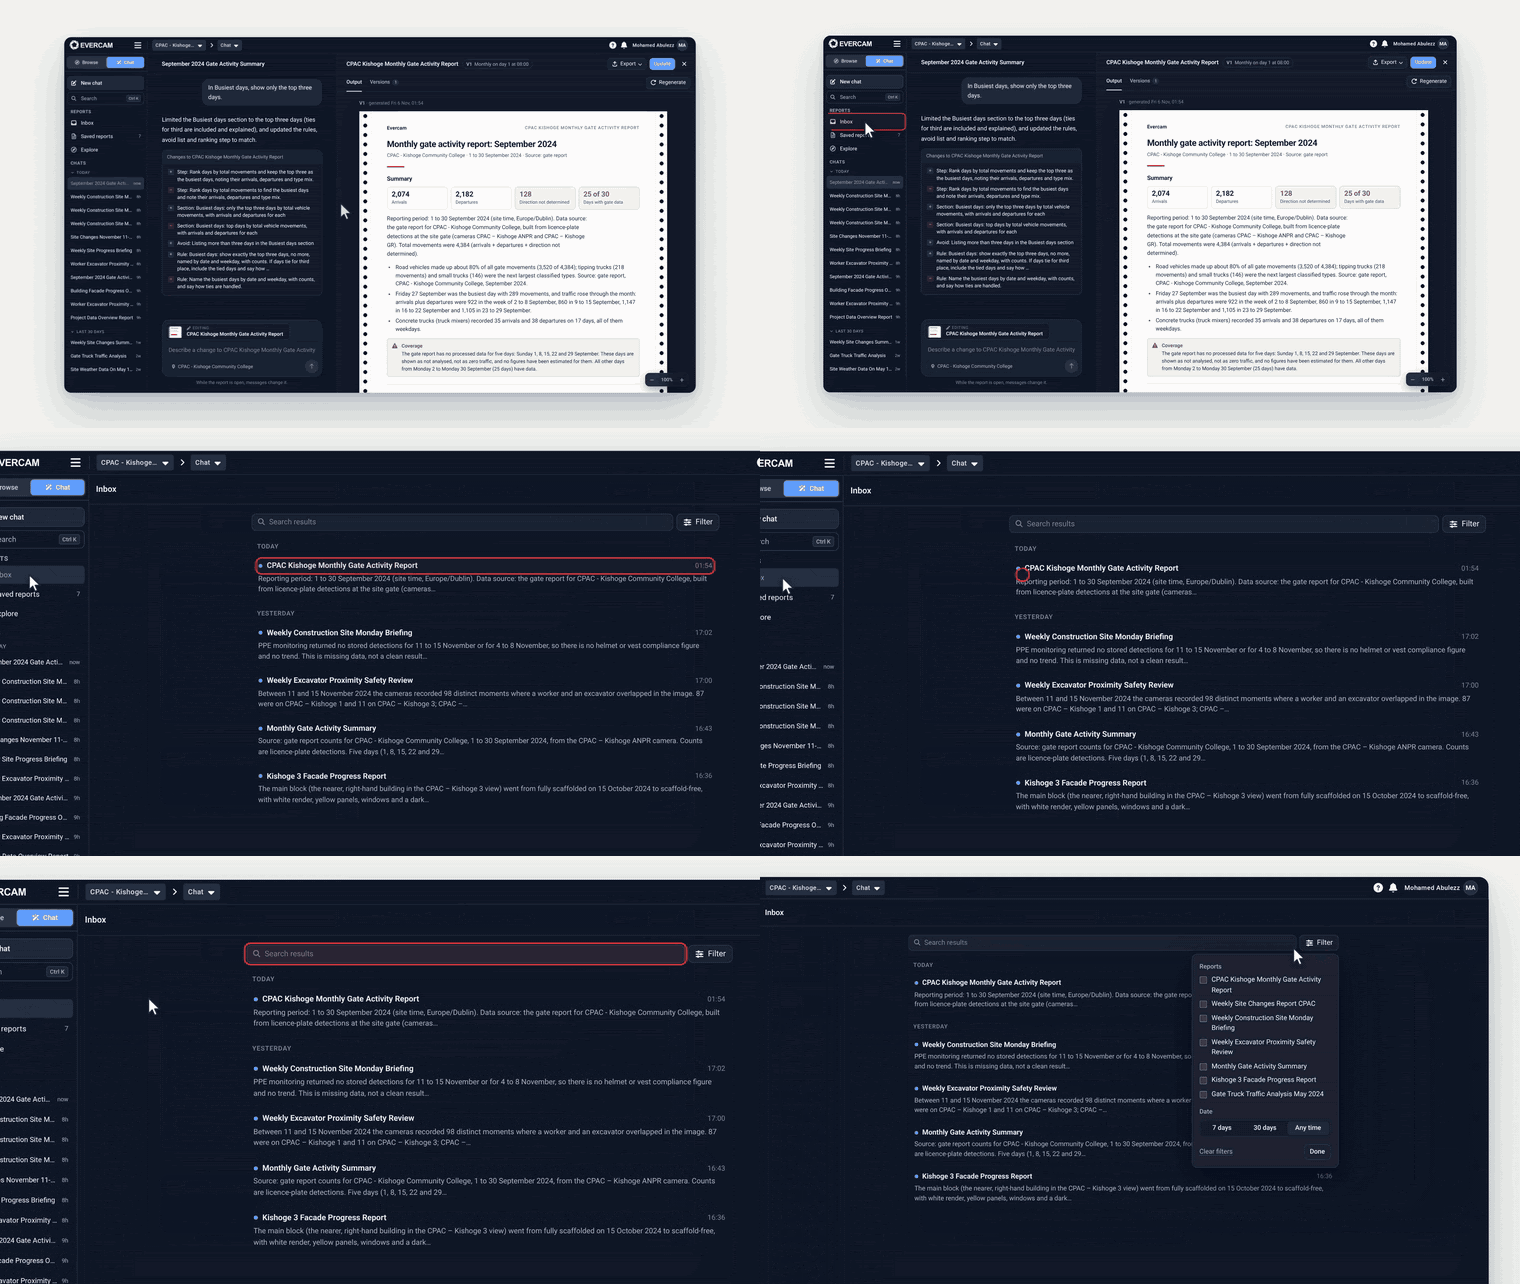
The Inbox: newest results first, with search and filters
On a result:
Use the arrows to move between earlier results of the same report.
Select PDF to download it.
Select Email to send this one result to someone as a PDF. This doesn't change the report's recipients.
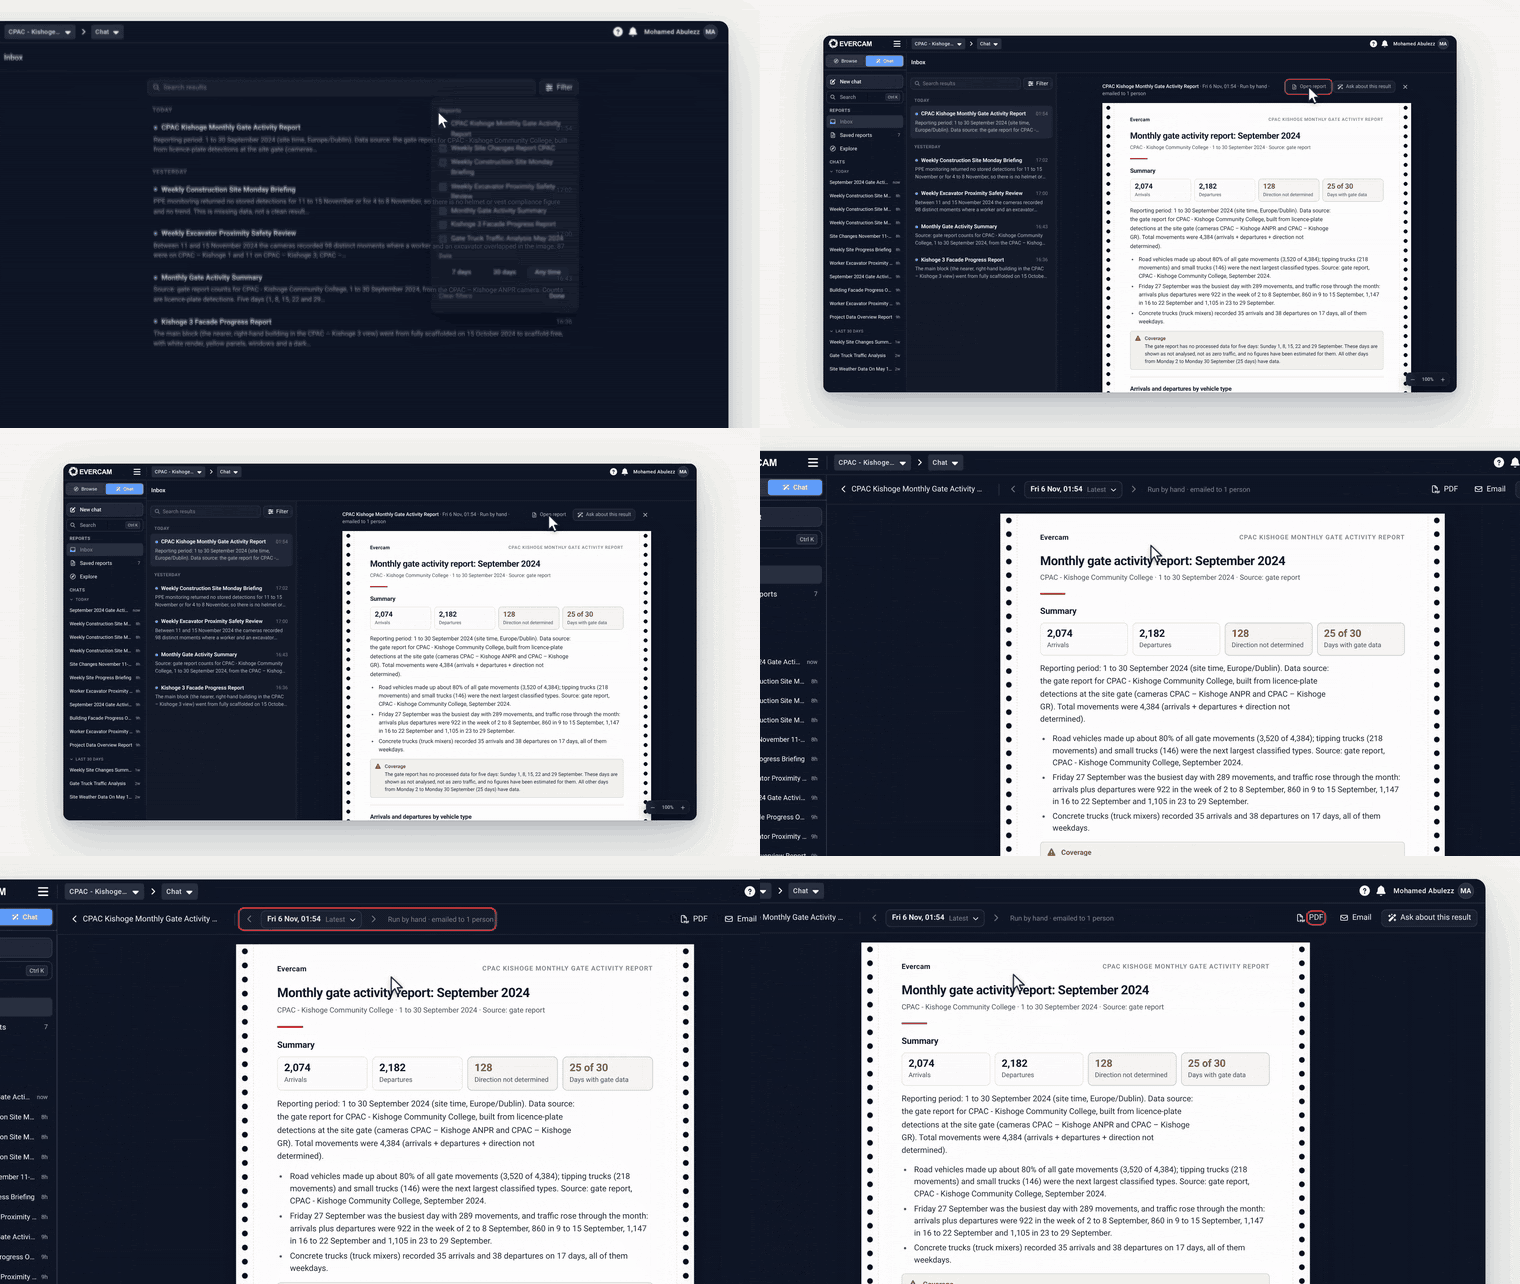
Opening a result, stepping through earlier results and downloading a PDF
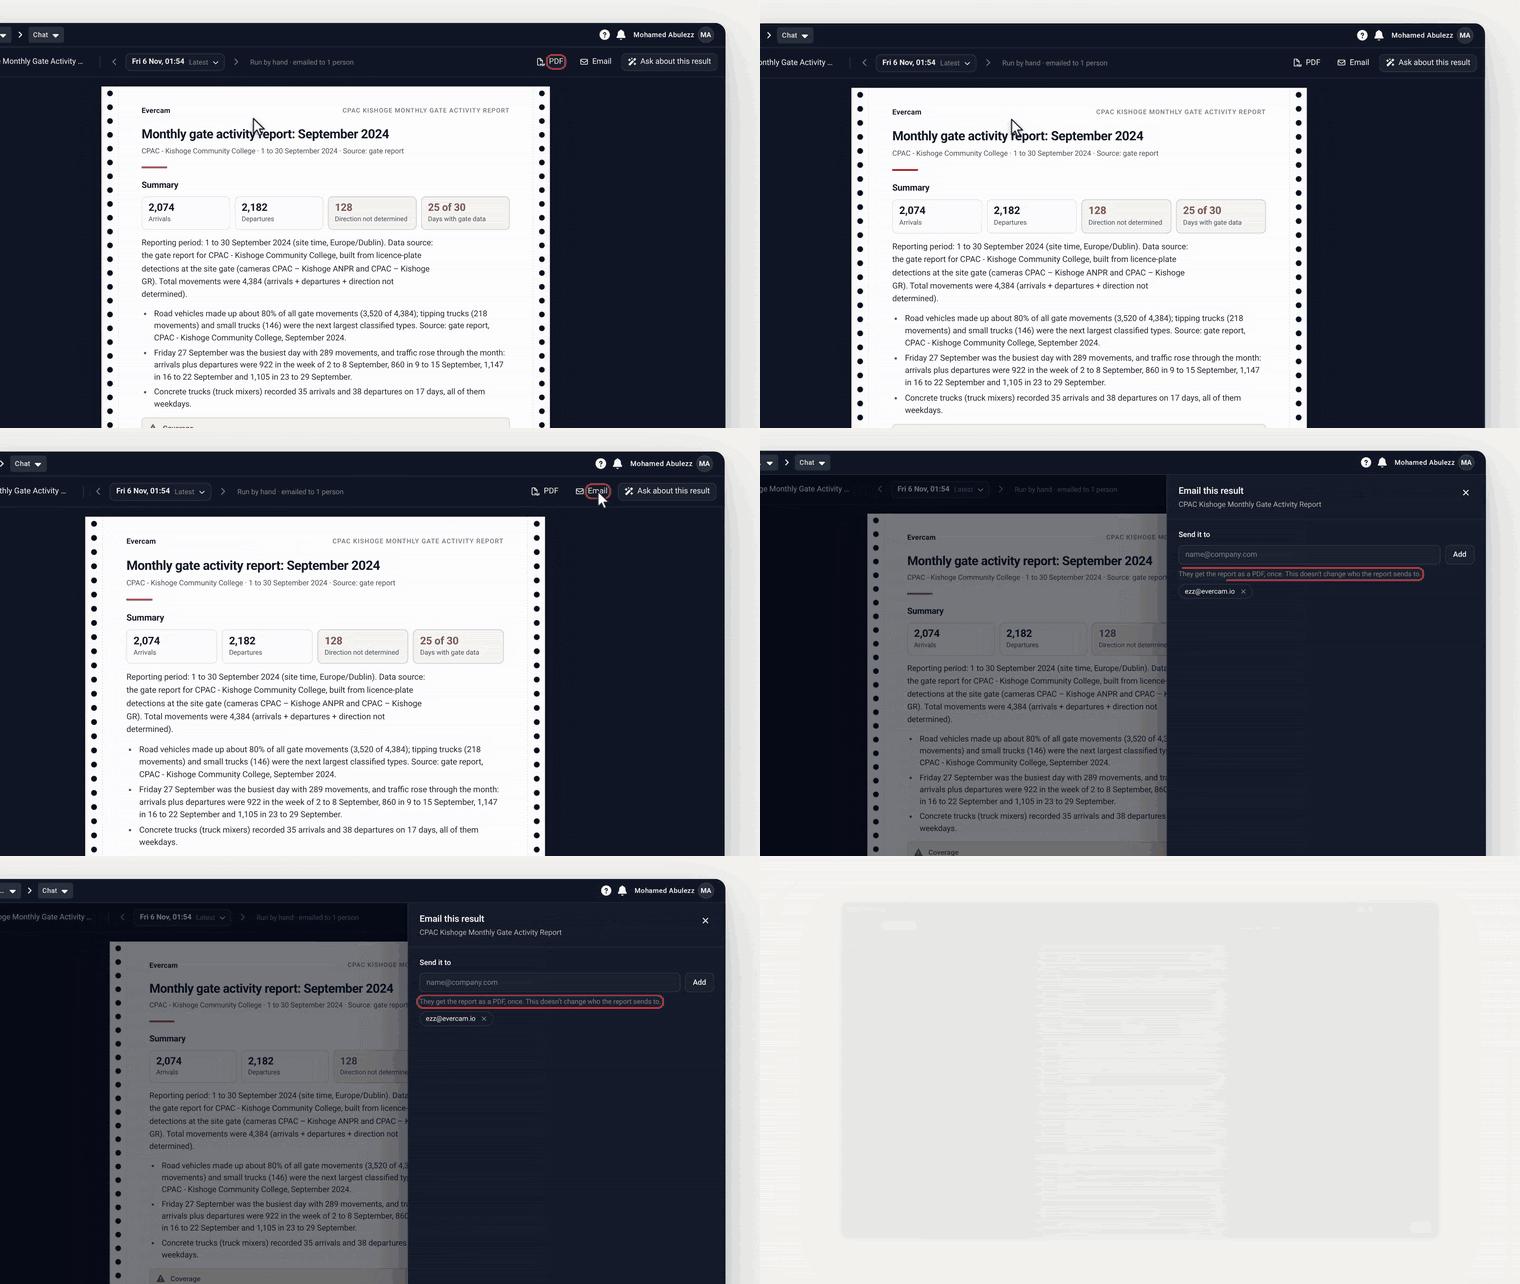
Emailing a single result

A result, with PDF, Email and Ask about this result at the top
7. Ask about a result
When a result raises a question, ask it.
On the result, select Ask about this result.
A new conversation opens with the result already attached.
Ask your question, or pick one of the suggestions.
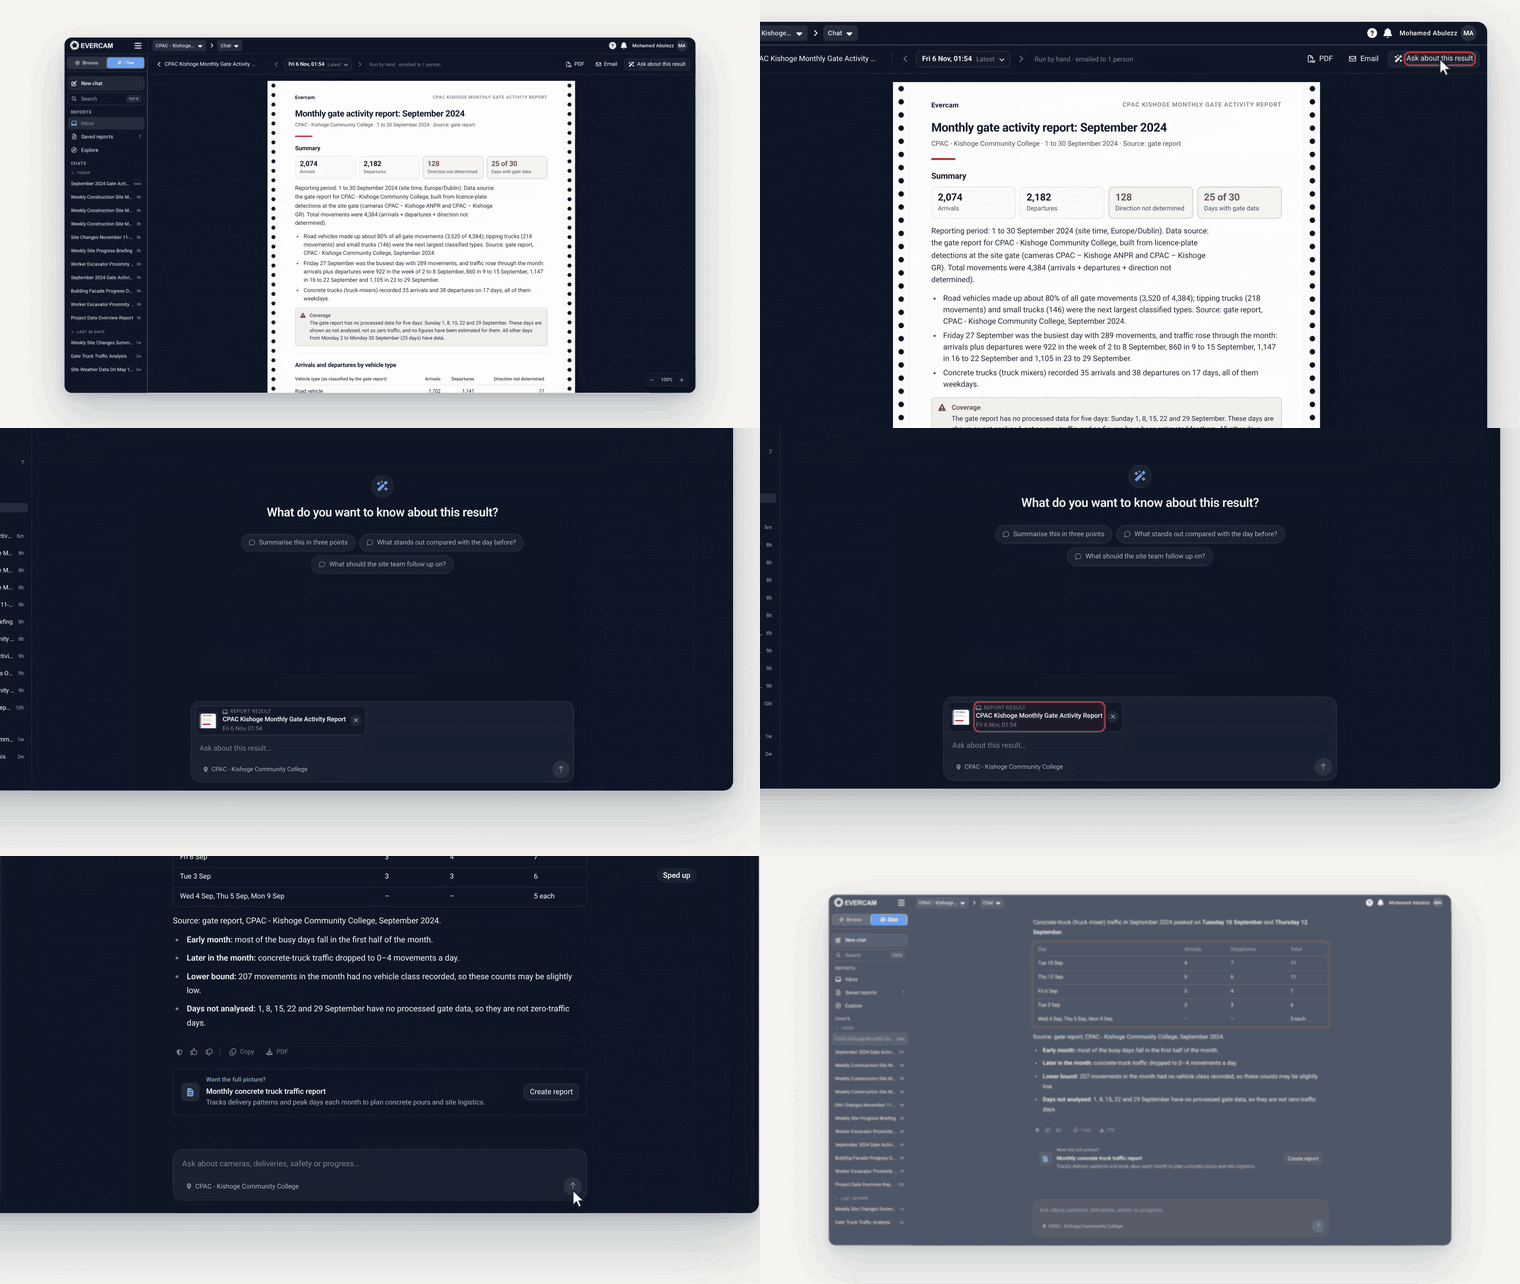
Asking a follow-up question about a result
8. Start from Explore
You don't always need to start from scratch. Explore holds reports published by the Evercam team, ready to try on your project.
Select Explore, then browse or search the reports.
Select Details to see what a report covers, how it works and an example result. The example uses sample data, to show what the report looks like.
Select Try it in chat to run it once on your project as a preview. Nothing is saved until you save it.
Ask for changes to fit your project, then save it as your own.
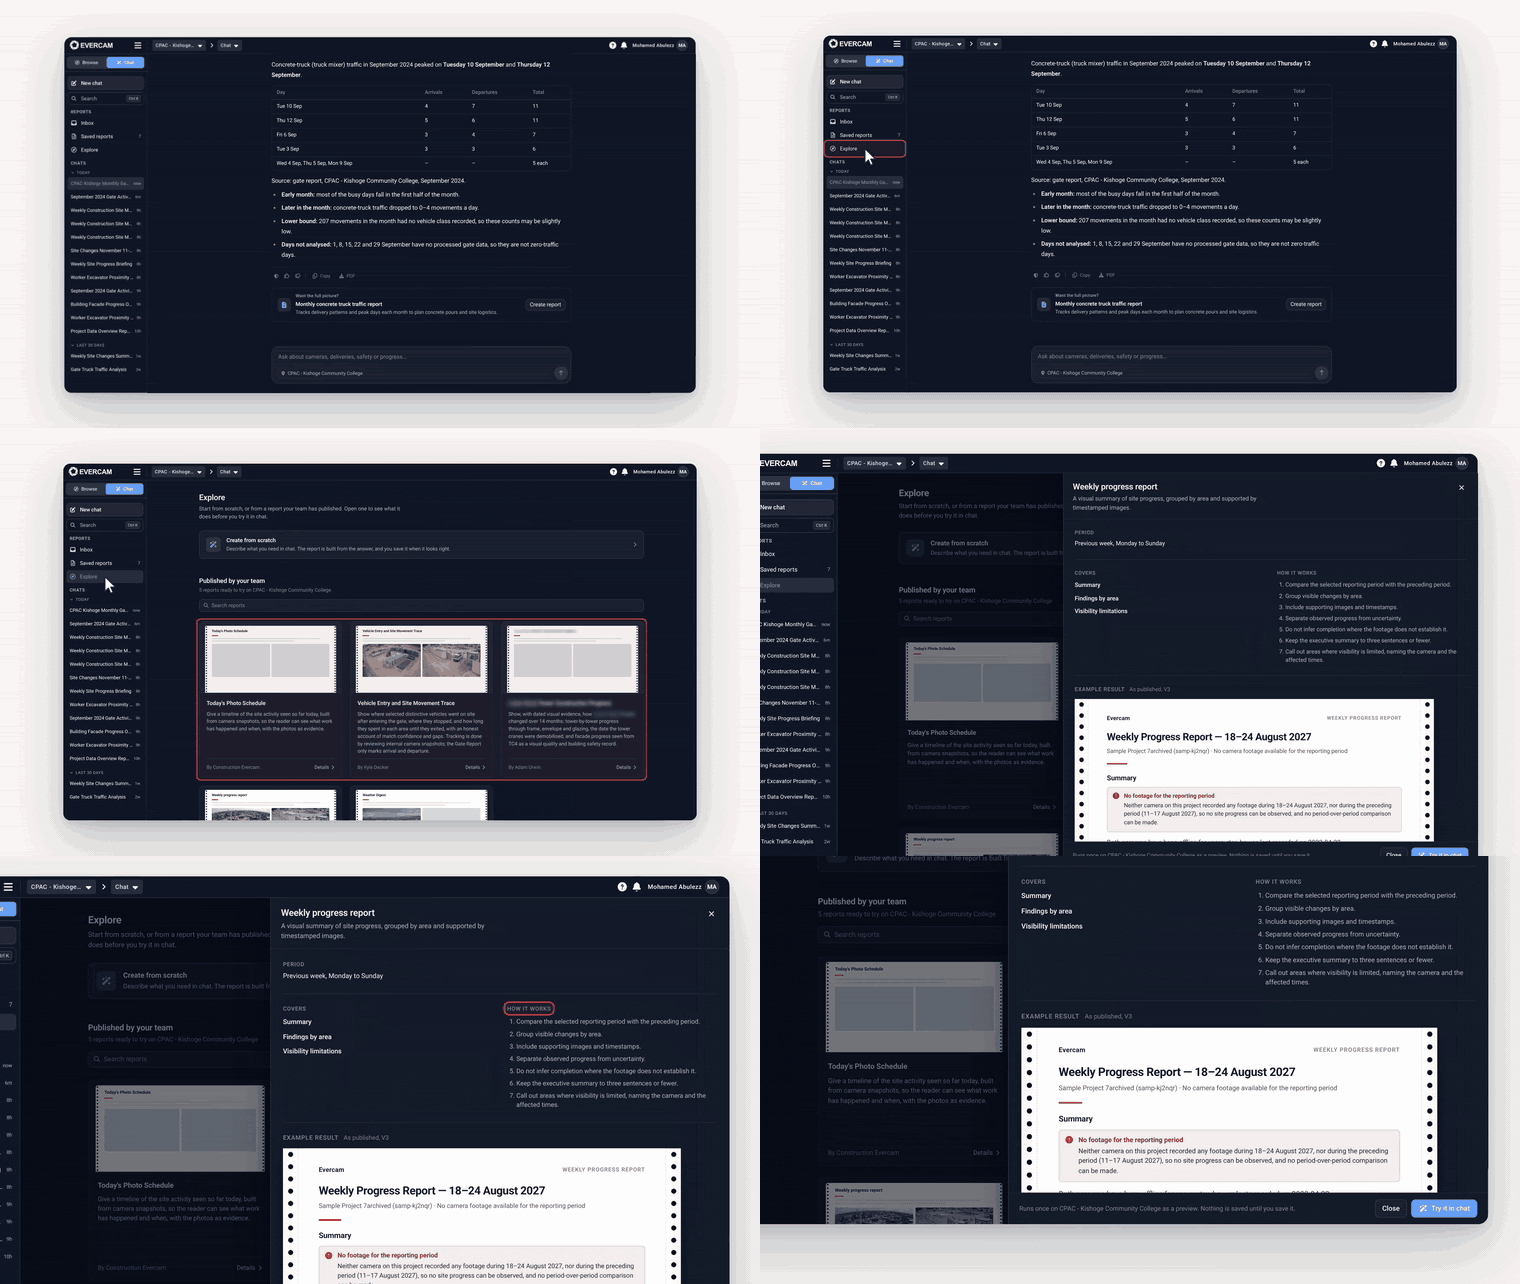
Explore: start from scratch, or from a published report

Details: what a report covers, how it works and an example result
Not every published report fits every project. Try it first, then change what you need.
Good to know
Who can see my saved reports and results? Your saved reports and your Inbox are yours. To share results with others, add them under Send each result to, or email a single result.
Do recipients need an Evercam account? No. Recipients receive each result by email.
Why don't I see Reports at company level? Reports work inside a project. Open a project and select Chat.
Why is a camera or a data source missing from an answer? Answers only use the cameras and data your account can access. If you think you should have access, ask your account administrator.
When does a scheduled report first run? At the next scheduled time after you save it. To get a result straight away, select Save and run now or Run now.
What happens to results when I pause a report? They stay. Pausing only stops new runs, until you resume it.
What changes when I edit a report? Selecting Update saves a new version of the report. Future runs follow the new version, and earlier results stay as they were.
Can Reports use drone or 360 data? Not yet. Reports work with your fixed cameras, Gate Report, Smart Search and PPE detection today. Drone and 360 support are on the way.
Watch the walkthrough
A five-minute film follows the same example from start to finish.
Chapter | Starts at |
|---|---|
Opening | 0:00 |
| 0:29 |
| 1:20 |
| 1:46 |
| 2:21 |
| 3:11 |
| 4:08 |
| 4:46 |
| 5:06 |
Recap | 5:30 |